작년 땡스기빙에 미국 시댁식구를 초대함에 이어 금년 땡스기빙엔 서울에 사는 시댁 친척가족(3)과 친정부모님(2)과 우리 집에 함께 모이기로 해 땡스기빙 당일인 목요일 대신 토요일 저녁을 준비했다. 사실 이렇게 여러명 초대해 보기는 처음인가보다. 그래도 4인 이상 모이는 거라 생전 처음하는 칠면조 (다리만!) 도 준비하고 몇가지 사이드디시까지 계획해 아주 긴장되는 며칠이었음. 


금년의 메뉴:


- 터키다리: 통칠면조는 한국식 오븐에 들어가지도 않기에 다행히도 스트레스 안 받고 터키의 일부만 선정. 

- 메이플 디존 닭고기: 토요일 아침에 닭고기 더하기 아가베 시럽 (메이플 시럽이 없어) 디존머스터드 등의 양념을 한꺼번에 슬로우쿠커에 넣어 저녁 시간에 꺼내는 레시피 선택. 

- raspberry sauce: 몇년 전부터 사용해 오던 크랜베리 레시피를 사용하긴 했으나 크랜베리를 안 팔아 raspberry 로 대체

- chutney: 작년에도 사용했던 barefoot contessa의 레시피 사용

- stuffing: 땡스기빙 요리 중 내가 가장 좋아하는 스터핑 역시 barefoot contessa 아줌마의 레시피 사용한다.

- collard 야채 볶음: 냉동 새우와 관자살 섞어 버터와 소금 후추로만 간.

- fresh salad: 시금치샐러드에 사과, 건크랜베리, 건살구 등을 섞어.

- mashed potatoes: 난 별로 좋아하지 않지만 땡스기빙 사이드 디시로 절대 빠져선 안된다 하는 K의 주장으로 준비. 역시 치즈를 좀 많이 섞으니 내가 익숙하던 텁텁한 감자의 맛보다는 훨씬 나음. 링크 레시피 강추. 

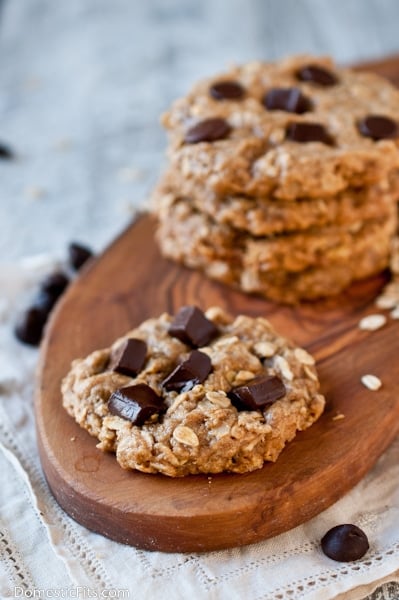
- 그리고 디저트로는 레몬 쿠키와 당근/고구마 컵케잌을 준비: 고구마 브라우니 레시피에 당근을 추가. 


쿠키, 컵케잌과 스터핑은 전날에 준비해 놓고 


납작한 팬에 다 못 들어간 스터핑은 머핀틀에 넣어 토요일 낮에 간식으로 먹어 치움. 


그래서 완성된 땡스기빙 테이블: 


터키요리가 좀 탄듯했지만 역시 가슴살보다는 쫄깃쫄깃해 맛 좋았고 


생각보다 짭짜름하게 간이 된 야채 볶음도 굳. 


개인적으로 비주얼은 mashed potatoes 가 최고. 


친정엄마가 가지고 온 묵까지 더하니 나름 한식까지 어우러진 땡스기빙 식사였음. 


무엇보다도 자주 못 보는 가족들과 편히 앉아 먹을 수 있는 (애는 어른들 사이를 뛰어 다니며 배불리 얻어 먹는) 따뜻한 시간이어서 최고였음. 


해피 땡스기빙. 


'on my table' 카테고리의 다른 글

상 위의 혼란기.  (6) 2015.02.06
2015년부터는 내 입맛대로.  (10) 2015.01.12
Thanksgiving 2013  (4) 2013.12.10
Thanksgiving 2012  (16) 2012.11.28
마르게리따 피자. Homemade.  (6) 2012.06.30

자기 생일이 꼈다고 10월을 best month of the year 라 칭하는 K에게 금년에도 선물 대신 진짜 케잌을 만들어 주겠다고 약속하고 당일엔 길 건너 파리바게뜨에서 치즈케잌을 사 왔다. 난 계속 진짜 케잌 (뽀송뽀송 촉촉한 빵케잌) 얘길 하는데 며칠 내내 치즈케잌 노래만 부르길래 그냥 확...


아빠 앞에 안긴 앤 케잌 한 입이 들어가야 눈에서 힘을 뺄 줄 알고. 


며칠 후에서야 계획했던 케잌 대신에 컵케잌을 구움. 


언니가 진짜 간단하다며 준 레시피가 사실 그리 간단하지만은 않았지만 브라우니믹스도 제대로 굽지 못하는 베이킹치치고 이정도면 엄청나게 잘 나온거다. 

그래서 할로윈인 오늘은 carrot banana apricot muffin 을 구웠는데 이것 또한 나쁘지 않음. 


한국의 여름이 유난히 무더워서였는지 올해는 가을이 특별히 감사하게 느껴졌고 운전을 할 때나 산책을 할 때나 노랗게 변한 벼밭 보도블록 바로 옆에 숭숭숭 꽂혀진 무를 보며 가을의 자연을 좀더 실감했었다. 


이젠 벌써 겨울을 실감한다. Bye bye October. 한해가 벌써 이렇게 지나가는구나. 


'my days' 카테고리의 다른 글

2015 새해계획  (4) 2014.12.18
첫 크리스마스 트리 2014  (4) 2014.12.13
2014 새해계획 수정  (2) 2014.10.27
동탄 cafe Bubus, 서울 어린이대공원 나들이.  (0) 2014.06.24
오늘은 봄이었다.  (10) 2014.03.18

밀가루 없이 가능한 쿠키 레시피:


flourless peanut butter oatmeal chocolate chips cookies 3


Need:


1C peanut butter

1C brown sugar

1t baking soda

1C whole oats

1/2C chocolate chips

1 egg


1. Preheat oven to 350F.

2. In a large bowl gently stir together all ingredients.

3. Add golf balsize mounds to a cookie sheet covered with parchment paper. Flatten to one-inch circles using your hand.

4. Bake for 10-12 minutes or until the edges turn golden brown. Pull the parchment papeoff the cookie sheet and onto a flat surface. Allow to cool.


(Source: domesticfits)


Need: 

2 C flour

  • 3 t baking powder
  • 1 t baking soda
  • 1/2 t salt
  • 1/4 c granulated sugar, plus more for sprinkling
  • Zest of 1 lemon
  • 7 T unsalted butter, cut in to small cubes and kept cold
  • 1 C plain nonfat Greek yogurt, plus more for brushing (Symon recommends Dannon Oikos)
  • 1/4 C whole milk

1. Preheat oven to 450 degrees.
2. Combine flour, baking powder, baking soda, salt, sugar, and lemon zest in a bowl. Add butter and work into flour mixture until it resembles coarse crumbs.
3. In a small bowl, whisk together yogurt and milk. Add to flour and butter mixture. Stir just until dough comes together, then knead, being sure not to over work it. Dough will be slightly sticky when finished.
4. Turn dough out on to a floured surface and press out to 3/4-inch thickness. Cut into rounds (use a circle cutter or a drinking glass), pressing straight down and not twisting. Lay biscuits onto a baking sheet. Brush tops with a little bit of yogurt, then sprinkle with sugar. Bake for 12 to 15 minutes until light golden brown.


(Source: shape)

드디어 K도 30대에 들어섬을 축하하기 위해 소질없는 베이킹에 눈을 돌리고 

정말 쉽고 재료도 많이 필요하지 않다는 크러스트 없는 치즈케잌에 도전했다. 


아무리 쉽다고는 해도 괜히 자신 없어 경력 있는 언니 한명과 같이 배워보고자 하는 언니 한명을 초대해 완성. 

쉽긴 쉽더라만 언니들의 블렌딩/랩 요령이 없었다면 내 케잌은 생일날 쯤 만신창이가 되었을 수도.  


이번 K의 생일은 선물 자체보다는 선물의 전달 방법에,

케잌의 맛보다는 (얘도 딸과 박자 맞춘다고 며칠째 설사 마라톤 하느라 결국엔 한조각의 반 밖에 못 먹음) 내가 케잌을 구워 이틀 냉장고에 숩겨놨었다는 거에 서프라이즈. 


happy birthday. 

'my days' 카테고리의 다른 글

Christmas Eve 2013: Atlanta, GA  (4) 2013.12.30
2014 새해계획  (10) 2013.12.22
2013 새해 (...) 계획  (6) 2013.05.04
Get back into it.  (0) 2012.11.18
Taste of Tacoma  (8) 2012.07.02

날씨 화창. 

바질 화분도 아직은 꼿꼿이 버텨 주고 있다. 


K는 하얀 또는 통호밀 식빵을 하루에 한봉씩 먹어 특별히 식빵만 좋아하는 줄 알았더니 내가 전에 만들었던 빵도 맛있었다고 슬쩍 얘기하길래 막판에 베이킹까지 하게 되었다. 이번엔 지난 번의 레시피를 그대로 응용하여 부엌 카운터에 항상 놓여 있는 mixed nuts & fruits를 2-3움큼 정도 추가했더니 건과일 (cranberries, raisin) 에서의 단맛이 적당한 flavor 를 추가해 더욱 맛있었음. 


아직 따뜻할 때 썰어먹는 첫 몇 조각은 최고. 


쨈도 필요없다. 원래는. 

'my days' 카테고리의 다른 글

Get back into it.  (0) 2012.11.18
Taste of Tacoma  (8) 2012.07.02
Lunches: Ivar's scallops and chips, 순두부찌개, Doritos taco  (4) 2012.06.25
IKEA, Seattle Storm (WNBA) game  (2) 2012.06.25
Lunch and park (again)  (0) 2012.06.24

집에 있는 남은 재료들 중 몇을 모아 (양파, 이탈리안 소세지, 시금치, 시금치) 매우 기름진 샐러드를 배불리 먹었다, bread salad: (크루통은 보통 토핑으로 적합하나, 난 빵조각이 메인으로 이루어진 샐러드빵을 해 먹음.)


집에서 만든 빵이라 오븐에서 갓 나왔을 때는 대강 썰어서 고르곤졸라치즈와 꿀만 (고르곤졸라 피자 생각하면서...^^;;):


고르곤졸라 치즈는 하루 빨리 먹어야지, 좀 오래되면 더욱 강해질 냄새가 상상이 간다.

지난번과 같은 레시피를 사용해 앞으로 2주간 먹을 빵을 만들어 보겠다고 일은 벌여 놓고 약간의 의문점이 생겼었다. 레시피는 whole wheat ciabatta (통호밀 치아바타) 레시피인데, 그냥 보통 밀가루 (all purpose flour) 를 사용해도 밀가루, 물 양/비례가 맞을까. 물론 이 의문도 물과 밀가루를 다 부어 섞다 보니 아무래도 반죽이 너무 질어서 들었던 것...

밀가루도 얼마 남지 않아 한스푼씩 계속 넣어도 반죽은 좀 마를 기색이 없고 나중엔 정말 반죽에서 물을  짜내고 싶은 심정에 할 수 없이 질은 반죽 그대로 냉장고에 덮어 둬 부풀기를 기다리니 다음날 아침까지 부풀지도 않는다. -_-;

그래서 할 수 없이 그냥 구웠다. 아주 따끈따끈할 때 잘라 먹으니 통호밀가루에선 맛 볼 수 없었던 쫄깃쫄깃함이 좋긴 한데, 촉촉한 맛이 순밀가루 빵의 맛인지 덜익은 반죽의 맛인지 구분이 안 간다. (하지만 나의 나름 예민한 배가 탈이 안 나는 것으로 봐선 다 익은 것 같음. ^^;)


그리고 집에 항상 사 두는 사과는 아침 대용으로도 좋고, 사이드 샐러드로도 좋고 그냥 간식으로도 좋고, 난 밤참으로도 먹는다. (엣, 배가 고프다는데...)


최근 치즈 외의 한가지 럭져리라면 dried berries (블루베리, 딸기, 크랜베리) 를 사 두며 심심할 때 손으로 집어 먹거나 아무 음식 위에나 뿌려 먹는 것.

'on my table' 카테고리의 다른 글

Almost vegetarian lunch & snack.  (4) 2012.03.25
Eggs benedict 에그 베네딕트  (6) 2012.03.24
김치오븐파스타  (10) 2012.02.19
Moroccan lamb 모로칸 양고기 요리  (6) 2012.02.17
시금치, 토마토 orzo 파스타  (16) 2012.02.16
크리스마스 브라우니:


그리고 신혼부부를 위한 요리책:


newlywedkitchen


(무슨 레시피가 들었는지 몰라도, 시도해 볼 법한 레시피들일 것 같음.)


(Photos: madebygirl, seattlemag)

'anything colorful' 카테고리의 다른 글

아파트 위시리스트  (2) 2012.01.18
I'd like,  (0) 2012.01.09
트와일라잇 배우 Kristen Stewart 따라하기 외.  (2) 2011.12.14
I'd like,  (3) 2011.12.11
베이컨을 입은 터키  (4) 2011.11.30
엊그제 의 레시피를 사용해 이틀에 걸쳐 치아바타 빵을 만들어 냈다.
하루에 식빵 1.5팩도 다 먹을 정도로 빵을 사랑하는 K는 계속 부엌을 들락날락하면서 도울 거 없냐길래...


 의외로 멀쩡한 겉모양이 나왔다.


열어보니 속도 멀쩡.
맛보고 K나 나나 둘 다 놀람.


보통 치아바타 빵에서 바라는 스펀지 모양의 속은 아니었지만 맛만큼은 쫄깃쫄깃.


다시 시도해 볼만한 레시피: 


Need:


4 cups (510 grams) white whole wheat flour
1-1/4 teaspoons (4 grams) instant yeast

1-1/4 teaspoons (10 grams) salt
1-1/2 teaspoons (10 grams) honey or sugar
2 cups + 2 tablespoons (482 grams) room temperature water, about 70ºF
1-1/2 tablespoons (21 grams) extra-virgin olive oil


[레시피 요약]
[전날 저녁] 

1. In a large bowl, mix the flour, instant yeast, and salt together with your hand.
2. Mix in the honey, using your fingers to distribute it evenly throughout the flour.
3. Add the water graduallyuntil you have a thick, sticky, somewhat smooth and cohesive dough. 
(Dough will be wetter than other types of bread dough.)
4. Once the dough is mixed, add the olive oil and work into the dough for several seconds, just enough to coat the dough.

5. Next, the stretch and fold technique to develop the gluten: using a hand dipped in water to keep from sticking to the dough, begin by lifting one side of the dough, stretching it upward and then folding it over towards the center.
6. Then lift the dough and flip it over so the bottom is now the top.
7. Cover the bowl loosely with a towel, and let sit for 15 or 20 minutes.
8. Repeat this stretch and fold technique every 15 or 20 minutes, for a total of four to six repetitions.
9. After the final stretch and fold, very lightly oil the bowl and turn the dough to coat it, then cover the bowl tightly with plastic wrap and refrigerate overnight.


[다음날 아침]
(다음날 아침의 레시피를 끝까지 읽고서 베이킹을 시작했어야 하는데, 처음 읽으면서 바로 하다 보니 레시피 끝부분에서는 없거나 뭔지 모르겠는 재료들이 있어 기분 나는대로 그냥 생략한 부분이 좀 있었다.)

1. Remove the dough from the refrigerator and let it sit, still covered in the bowl, for at least an hour.
2. The dough should have at least doubled its size overnight and may have large bubbles.
3. Once the dough is room temperature, gently lift it from the bowl and place it on a well-floured surface.
4. Cut the dough in half.

5. Loosely fold it into thirds by folding the bottom edge towards the middle, and then the top edge over that.
6. Do this very gently: you don't want to de-gas the dough while you shape it.
7. Turn the shaped dough over so the folded sides are facing down, and place it on a large piece of floured parchment paper.
8. Sprinkle with more flour.
9. Repeat this process with the second piece of dough.
10. Cover both pieces of shaped dough with plastic wrap and let proof for 45 minutes in a warm spot.


11. Place a large rectangular pizza stone on the middle rack in the oven. (피자스톤이 없어 그냥 metal pan을 사용함.)
12. Place a heavy cast iron skillet filled with oven-proof rocks on the bottom rack set on the lowest position in the oven, underneath the pizza stone. (Oven-proof rocks는 또 뭐야.. 생략.)
13. Preheat the oven to 500ºF.


14. Just a few minutes before the dough is finished proofing, heat about two cups of water until boiling in the microwave. Pour the water into a metal watering can with a long spout, and set aside. (생략.)
15. When the dough finishes proofing, remove the plastic wrap and gently turn the dough so that the folded side is once again facing up, and sprinkle with more flour.
16. Carefully slide a large pizza peel underneath the parchment paper with the shaped loaves, and slide onto the pizza stone in the oven. (Pizza peel 은 또 뭐야.. 생략.)
17. Take the watering can and pour the hot water over the stones in the cast iron pan to create steam, being careful not to burn yourself or splash the water on the hot oven window. (생략.)
18. Close the oven door and lower the temperature to 450ºF.
19. Bake for 20 minutes, then rotate the loaves 180º degrees, using the edges of the parchment paper to turn the loaves.
20. Remove the parchment paper from underneath the loaves. (종이를 꺼내지 않으면 꼭 타버려서 화재경보기를 울릴 것 같은 느낌.)
21. Cook for an additional 15 or 20 minutes.
22. The loaves are done when they are colored a deep golden brown and sound hollow when tapped on the bottom.
23. Transfer to a wire rack and let the loaves cool completely. (Wire rack 이 없어 메탈팬의 가장자리에 비스듬히 세워 식힘.)


(Source: themusicianwhocooks)

'on my table' 카테고리의 다른 글

[breakfast] 김치, 베이컨 (찜)밥  (0) 2011.11.16
토마토 수프  (0) 2011.11.15
Thai Basil Beef  (2) 2011.10.30
피넛버터쿠키  (6) 2011.10.28
[breakfast] 씨리얼 + greek 요거트  (2) 2011.10.27

+ Recent posts